Showing posts with label DIY. Show all posts

Monday, March 2, 2015

Story in a Can!

Many of my poor language disordered students have such difficulty telling stories.  I'm sure that's no surprise to you.  Narrative skills are not usually the strong suit of someone with language learning problems.  They often lack structure, vocabulary, and understanding of overall language.  Needless to say, we work a lot with stories and books in our speech room.

My newest product targets just that - narratives.  It's a fun way to get kids excited about telling stories.  In fact, my little ones actually ask for the story cans!  (I love it when they don't realize they're learning something while playing).

Disclaimer: This post contains amazon-affiliate links.

Now, this product involves a little bit of craftiness on your part to set everything up.  Don't worry, it's nothing complicated.  You can make it as cutesy or as easy as you'd like.

You'll need about 6 small cans or containers, modge podge or glue, and scrapbook paper.


You can just print the labels and affix them onto any small container if you don't have time to mess with making it cutesy.  OR you can decorate the cans with scrapbook paper, stickers, or even have the students help you!  I used scrapbook paper and printed the labels onto full sheet sticker/label paper.  This made it easy to attach.  


This download also contains sheets to make your own story chips to place inside the cans.  I print these on full sheet label paper as well, so that I don't have to bother with sticky glue. 


Just cut out the circles (or use a 1.5" punch) and attach to poker chips.  I used these:


They turned out super cute.  :)  I put the different types of pictures onto different color chips to make it easier to separate.


There are pictures that target characters, setting, kick-off/problem, feelings, attempts/events, and extras/open-ended.  


It also includes story maps, graphic organizers, and illustrating/writing worksheets to use with the cans and chips.  


We use Braidy the StoryBraid in our speech room.  I LOVE Story Grammar Marker.  Find out more about it here.  Some of the worksheets and maps contain SGM terminology as options, since that's what we use.  There are blank versions as well for those of you who don't.  


There are lots of ways you could use these story cans.  I'd encourage you to get creative and find what works best for your kids!  There are several ideas for use in the download as well.

What do you think??  Could your kids use this in your speech rooms?  

Thursday, August 21, 2014

Shark Week in Speech with a {Freebie}

Shark week in the middle of the back-to-school hoo-rah?  I say that's a win!  This week we're celebrating a belated shark week in speech and you HAVE to check out all of our fun!


First, we're tying together our back-to-school theme with sharks by reading Don't Eat the Teacher by Nick Ward.  This book is super cute about a shark who likes to bite everything on his first day of school.  I think it might be out of print but you can still order it on Amazon HERE.
This post contains amazon affiliate links.


Next, I made this super fun shark out of an old tissue box and scrapbook paper.  He loves to eat artic cards and all sorts of therapy materials.  ;)


We also did a shark craftivity that included lots of teeth for target words and opportunities to practice following directions.  It's very similar to my dinosaur craft from a while back except this one has fun eyes and a cute dorsal fin.  Check it!


Grab the template for this for free HERE!

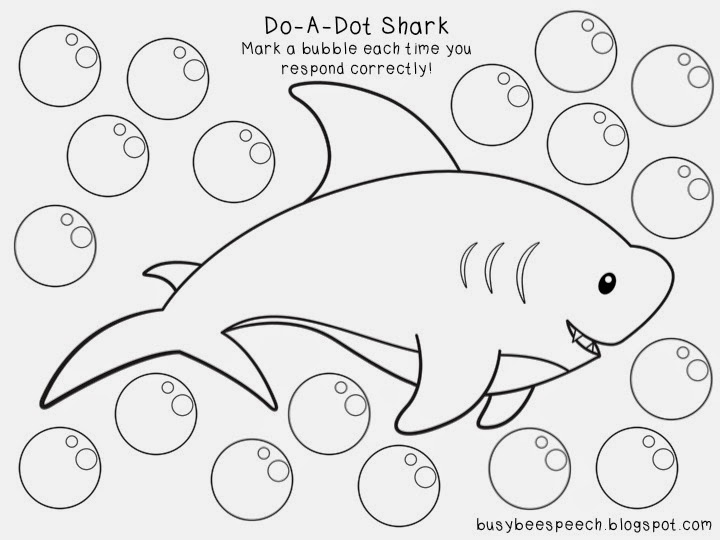
Also included in the freebie pack is this cute Do-A-Dot Shark worksheet.  Mark the bubbles each time you say a word or respond correctly.


What do you think?  How do you celebrate Shark Week?

Tuesday, July 9, 2013

Therapy Organization Planners & Binders

So I am totally one of those people with great organizational ambitions.  At the beginning of the school year everything is nice and neat and organized.  As the year moves along, piles begin to form and papers begin to stack up.  I look around and things are a little out of place  aren't so organized anymore  pretty much a wreck.

This year I'll be trying out some new systems, so I'm hoping that they'll stick...especially since I found out that I'm now going to be the only SLP at my school.  Yes, I work at a primary school.  No, I have no idea how I'm going to manage.  Any advice is welcome and appreciated lol.  I figure I'm going to have to be super organized to make it work.

In my attempt to coral my paperwork, I'll be keeping a therapy binder or 2.  I combined a couple of great downloads I found on TPT to make my binder.  I used the Let's Get Organized packet from [simply speech] and the 2013-2014 SLP Monthly Planner from Denise Polley.


Both packs have such cute pages!  I just printed out the ones that applied to me and tweaked a couple of them a little with my sharpie to meet my needs.  :)


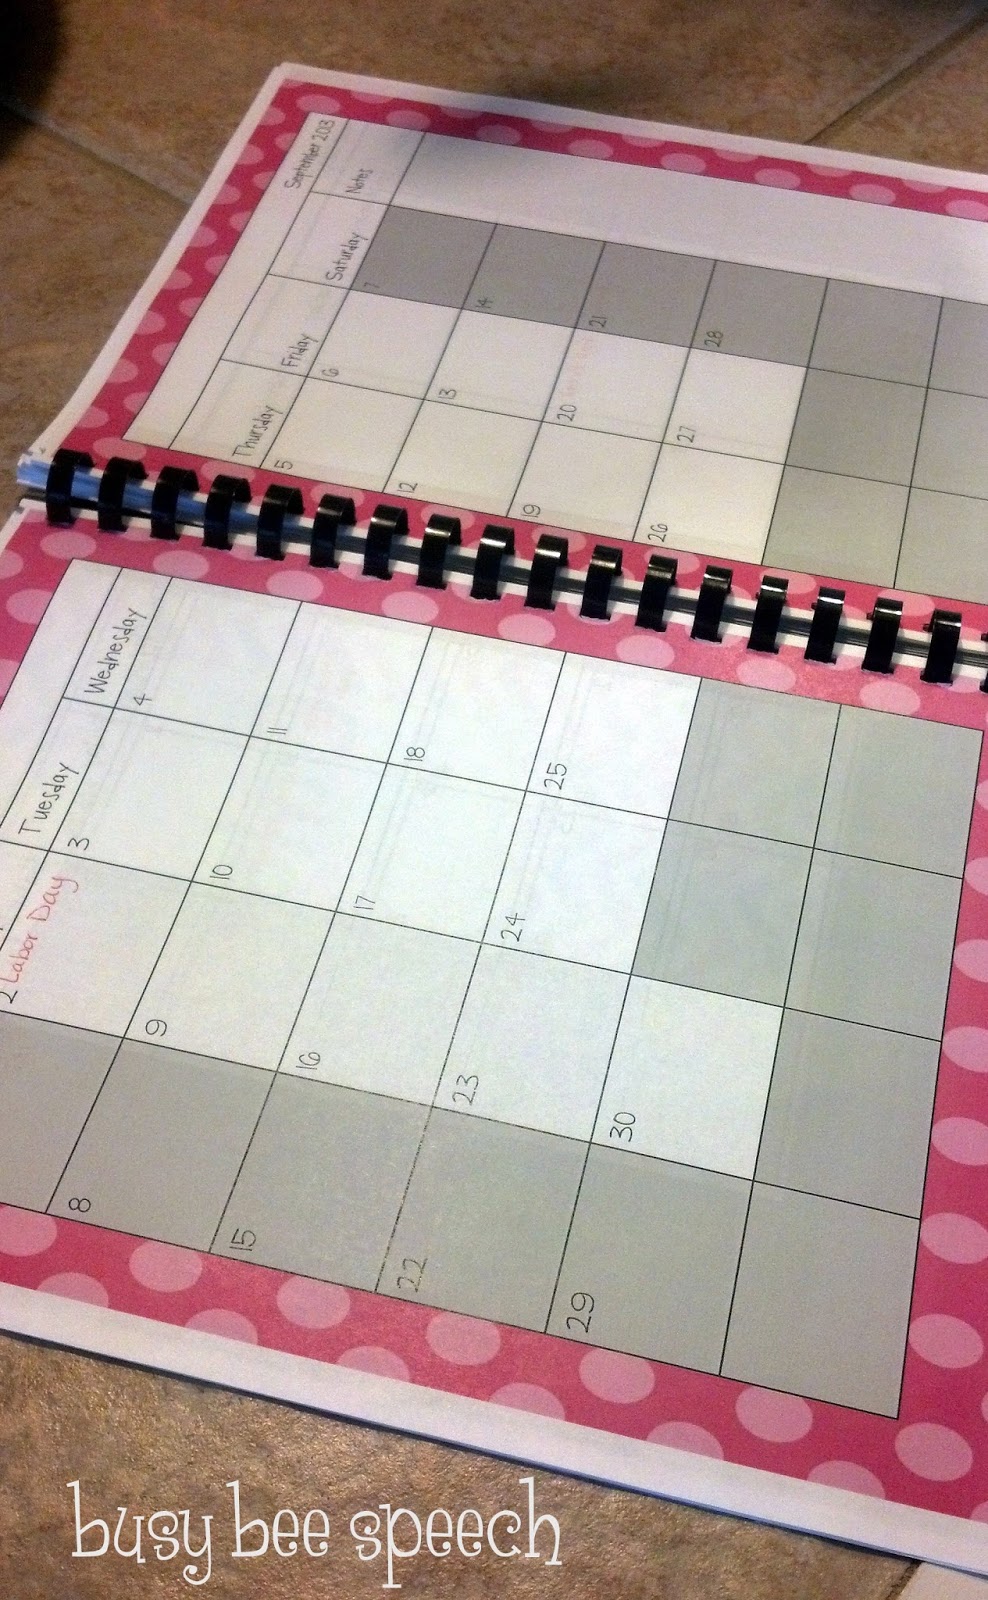
I'm thinking that this will be just what I need.  I've got a calendar for each month, referral info, and screening and RtI info.


I even included a copy of my district's procedure checklists for quick reference.


There are also sections for evals, re-evals, due dates, medicaid lists, running to-do lists, parent contact info, and more.  I spiral-bound it all together, so it's not as bulky as an actual binder.  It's more like a planner.

**UPDATE:  I recently created my own planner to customize it to fit more of my needs.  You can check it out HERE!

I do have another binder where I keep all my student data and attendance information.


I section it off by grade and store their lesson plans, tally sheets, and medicaid logs behind each tab.  Because these have to be filed every 9 weeks, they need to be in a place where I can transfer them easily.


I'm also thinking about keeping all of their therapy data on the Therapy Report Center app by Smarty Ears.  I'm still trying to work out the logistics of it.

How do you keep your paperwork organized?  Any tips you can share?

Wednesday, March 6, 2013

10 Fun Pinterest Finds for Speech

It's no secret that I love browsing around on Pinterest.  I admit that I probably spend way too much time  there, but there are just SOOOO many cool finds!  If it's used for educational purposes, can I justify all the hours I spend clicking around? (Please say yes lol)

I thought I'd share a few things I've come across with all of you and how I'm planning on revamping them for my speech room.

So, here are 10 of my favorite activities I've found on Pinterest.  Check 'em out!  The source buttons under each picture link to the pinterest pins.


1.  Power Towers - The canisters are filled with cups.  Students stack cups as they get an answer correct.  If they miss they have to start all over.  Speech style: Each cup could have an artic word on it - different canisters for different sounds.  If they say it correctly, they can stack.  If they say it incorrectly or knock over their tower, they have to start over.

{SOURCE}

 2.  Blooming Synonyms - These cute flowers were made out of construction paper and have synonym ladders in each pedal.  For speech, you could do the synonyms if that's one of their goals.  You could also do articulation words, fluency strategies, vocabulary, etc.  I'd probably also put their goal or target sound in the center circle.

{SOURCE}

3.  Bee Poetry - You know I do love busy bees, so I had to include these!  These were originally made to work on poetry.  For speech, I'll probably get the kids to write their speech goals on it next year and hang them in my room.  :)  You could also put artic words or glue pictures on it as well.

{SOURCE}

4.  Worms and Birds - Pipe cleaners act as the worms and clothespins act as the bird beaks.  You could use this as a reinforcer game.  For every correct answer, they pick up a worm.  Or maybe see who can pick up the most in 10 seconds.  This is great for fine motor as well.

{SOURCE}

5.  Elephant Trunk Craft - I saw this adorable elephant and immediately thought it'd be perfect for oral motor activities!  Kids can practice lip rounding, breath support, blowing, and sucking through the elephant's nose (ok, that was a weird sentence).  You could use different objects for the nose such as, straws, whistles, pipes, etc.

{SOURCE}

6. Bug Slap - I love these bug slapping games.  Anything that gets the kids talking and moving is right up my alley.  I have seen some bug slapping artic games that you can buy on TPT.  This one is just too cute with the  giant bugs drawn on bulletin board paper.  One student can say find a word with their sound and say it, while the other students race to slap it.

{SOURCE}

7.  Don't Fall Off the Web - I have some Spider-Man loving little boys on my caseload that would absolutely go crazy for this game.  Put Super Duper cards on the corners and have them walk on the lines without slipping.  They have to stop at each card to say the word/answer the question.

{SOURCE}

8.  Matching Letters Pole - This would be a cool center activity.  Each colored sticker could have words with a certain speech sound on it.  The students would have to find their letter on the pole and place a sticker over it.  I'd probably use several poles.

{SOURCE}


9.  Balloon Ping Pong - I'm planning on using this activity with my fluency kids.  It'd be great to talk about slow rate (the balloon is slow), light contact (hit the ball lightly), and pausing.  They could say a word or phrase everytime the ball is tapped.

{SOURCE}

10.  Spoon Puppet Theater - Ok, how cute is this?  This would be awesome for students working on social skills to role play different social scenarios.  It'd really work for any student that's working on conversation skills or at the conversational level.  Love!

{SOURCE}
So, which ones did you like?  What fun activities have you found on Pinterest?  Please share the wealth!  :)


Wednesday, February 27, 2013

Suessy Fun in My Speech Room

It's Dr. Seuss week at my school!  Love me some Cat in the Hat and One Fish Two Fish!  Sharing these silly rhymes, crazy words, and funny pictures with my students just makes me happy.  Check out what we've been doing in my speech room this week.


On Monday, one of my very fabulous preschool teachers gave me this cute Cat in the Hat face to use.

She made it herself, and it turned out super cute!  I just attached it to a tissue box and was good to go!  She told me that she was inspired by this post, in case you wanted to try and make your own.


Well this was the cat who tried to eat everything...and he especially loved artic cards!  ;)  We hid the cards and fed them to the Cat in the Hat when we found them.


During Dr. Seuss week last year, I made this cute "find it" shaker.  I printed out a bunch of /r/ and /s/ words from the Cat in the Hat and filled the container with rice.  The kids have to shake up the bottle to find the words.  So fun.  Check out how to make them here.


For the kids' craftivity, we read One Fish, Two Fish, Red Fish, Blue Fish and made cutesy little fish bowls inspired by this post.  Look how cute they turned out.

I first made giant fishbowls out of legal sized card stock.  I got out some paintbrushes and washable kid paint and let the kids paint "water" on the fishbowl.


I made some fishy printables and printed them out on construction paper.  While we read a few pages of One Fish Two Fish, I had the kids write words with their speech sound on their fish.


With my preschoolers, we glued little pictures to the fish.  My non-verbal kid worked on big/little by sorting the fish onto the different sides of the fishbowl.

They loved painting and gluing all of their fishies to the bowl!

If you want to try it too, you can grab the printables I made HERE.  There is a colored template and line art template.


What fun Seussy activities are y'all doing in your speech rooms this week??


Thursday, January 31, 2013

Preschool Week Day 4: Bag of Tricks!

Ok everyone...get excited!  This post is going to be a little lengthy but AMAZING!  I've got some fabulous bloggers ready to share their favorite toys, games, or activities that they have found useful when working with preschoolers.  Today we'll be hearing from Carrie's Speech Corner, Speech Room News, Communication Station, Let's Talk SLP, and [simply speech]!  Can't wait to take a peek into their bag of tricks! 


Carrie Manchester, Carrie's Speech Corner

Hi all!  Lauren recently told me about her preschool series and asked me to share with you one of my favorite preschool products.  I wanted to share this series of interactive books created by Beth E. Breakstone, a licensed SLP, and made with Picture Communication Symbols from Mayer Johnson.  I have seven of these books:


I wish I could tell you which one is my favorite, but they are all great!  Today I'll show you a little more of "Old McDonald."  All of the books come with interactive pieces, a board to place the pieces on, Velcro Dots to attach the pieces, and a communication board:


I like to start with the pieces in the book.  We remove them as we read the story and place them on the story board.  The first time through the story, we focus on imitating the vocabulary words/animal sounds.  After I finish this story with the kids, we go through it again ("to clean up").  This time, I target receptive vocabulary identification, asking the students to find a specified image and return it to the book.


These books have simple text and clear illustrations.  The interactive pieces are awesome for sustaining the attention of the little guys!  I think they are a must have for any SLP working in a preschool setting!
You can find more information on the books HERE.
Facebook link
TPT link

******************************

Jenna Rayburn, Speech Room News

Preschool is my favorite area of speech-language pathology. I love to see the impact from early intervention! My absolute 'go-to' for therapy are the Peek-A-Blocks. I love them for my lower functioning students. If you're looking for a new activities for early intervention for speech therapy, you don't want to miss these Peek-A-Blocks!


There are lots of different sets. I found the alphabet, instrument, and animal sets at Goodwill last summer. There are lots of different goals to target. This little friend and I were working on expressing single words paired with signs (for animals and colors). Of course we built towers and crashed them down! Perfect for 1, 2, 3, go! If you hold the bag of items, you can have the students requesting for each block. The kids just don't get tired of building towers! 
Jenna Rayburn, MA, CCC-SLP is a speech-language pathologist. Follow her at SpeechRoomNews.blogspot.com

******************************


When Busy Bee Speech asked me to guest blog about one of the things I have in my "bag of tricks" to work with PKers, one of my very favorite games came to mind. OFTEN in speech therapy for PK kiddos (and even some early elementary age kiddos), I use the game Twister and add my own...well twists!    I can work on color identification, left vs. right, following directions, taking turns, learning how to be a good sport, etc....ALL while working on speech and language goals.  


I have used the entire Twister board, or folded it in half.  I have had it on the floor or on the walls.  I have put stimulus cards, "points" cards, or even pieces of a craft activity the famous colored "dots".  It doesn't matter how I use it, I just matters that the kids have fun!  They get to jump, hop, twirl, roll, or even crab walk from one dot to the next to complete the task at hand.  


The movement keeps it fun and motivating and the Twister mat adds the structure necessary to pull off any game and focus on any goals you want.

******************************

Kristin Cummings, [simply speech]

I love using Ned’s Head in therapy! Ned is always a hit with my preschool kids. You don’t know Ned? You should get to know him!


To play Ned’s Head the way it was meant to be played, a bunch of disgusting plastic objects (bird poop on a worm, a dirty diaper, a melted lollipop) are put inside Ned. Students draw a card and take turns finding the object based on touch. Ned has been used in my classroom over 100 times but I have only played it the way it is meant to be played less than 5 times. Here are some of my favorite ways to use Ned:


  1. Put articulation cards inside Ned. Let students take turns pulling out a card. Then they practice the word or make up a sentence for the word.
  2. Put your own objects in Ned’s Head. Have the student reach in and grab one object. Without taking it out, he/she has to describe the object (it’s bumpy, it have 4 corners, it is soft, etc) and the other students have to guess what the object is! Great for expressive language and adjectives!
  3. Working on letter names and sounds? Place plastic letters in Ned's Head and have your kids draw out letters one at a time. They can find the match on a separate sheet, tell you the letter name and sound, or find an object that goes with the letter.
  4. Working on vocabulary? Put laminated pictures of target words inside Ned’s Head. Have the students name the picture when they pull it out.
  5. I created a sentence template to use with articulation cards. My sentence says "I found a ______ in Ned's Head." The students draw out an object or word card (depending on the target goal) and fill in the blank. This is good for working on complete sentences and articulation.
The possibilities are endless with Ned. You can find Ned’s Head on Amazon for less than $15.00. However, I know personally that when working in the school system, money is tight. Here is how you can make your own!

Use a shoebox and fill it with items. The one above is filled with old items from around my house, classroom, or from the dollar store. Use a bandana or pillowcase to cover the box so the students can’t see what’s inside! Have fun!

Kristin Cummings is a school based and private SLP from St. Petersburg, FL. She is also the author of the [simply speech.] blog. You can contact Kristin by:
Twitter: @simply_speech


******************************


One of my favorite preschool activities is the Animal Buddies game. This game features four animals: monkey, dog, rabbit, and elephant. Included in the game are four food items for each animal to eat – a banana for the monkey, a carrot for the rabbit, a peanut for the elephant, and a bone for the dog. The purpose of the game is to feed the animal the correct food item.


This game is so versatile that you can use it with any group. My articulation kids like to say their word/sound 5 times and then “earn” a food item (I pick it randomly out of the bag). Then the student can feed the correct animal the food. My language kids like to also “earn” a food item by using pronouns correctly, identifying prepositions, using word endings appropriately, etc.

I also have pictures printed of each food item. Sometimes I will bring the pictures out, and then instead of earning a random food item, the student will flip over one of the pictures and get that food item. To work on sight words, I will put the words (“bone” and “carrot”, etc.) on a spinner and have the student spin the spinner. If he or she can read the correct word, then he/she wins that food item!


My students also love to be silly and have the animal eat the wrong food. I allow this if we have played the game before and they know what the correct food is for each animal. They think it is HILARIOUS to see the rabbit eat a bone and a monkey eat a carrot. I’ve even taught them to make little “nom nom nom” noises when the animal eats the food. There are SO many things you can do with this game, and that is why it’s one of my favorite games to play!

Written by: Brea from Let’s Talk Speech-Language Pathology

Thanks so much for sharing, ladies!!  Be sure to visit their pages and give them a like!  

What do y'all think?  What kinds of things are in YOUR bag of tricks??  :)
Related Posts Plugin for WordPress, Blogger...