Showing posts with label Back to School. Show all posts

Thursday, July 31, 2014

Back-To-School Speech Therapy Classroom Kit

Back. to. school.  It's everywhere you look this time of year.  Kids are buying supplies and teachers are readying their classrooms.  You can practically smell the pencil shavings.

Well, for all of you SLPs getting ready for this next school year, I've got a cutesie new pack for you!  Here is my new Back-to-School Speech Classroom Starter Kit.  Check out everything that's included!


*A behavior incentive system - 2 options

Options include speech dollars in both color and grayscale options along with a speech wallet template, as well as 8 sticker chart designs.


I've also included reward coupons with a jar/can label.  These are a great alternative the same prizes, candy, or stickers every week.


I love the speech goals sheets and progress tracker.  The progress chart is in grayscale, so that you don't waste ink when you need to print lots of them.  Students can be trained to track their own progress by using it.


There's also a speech rules poster with mini rule posters.  These are so cute on your bulletin board.  Mine is slightly different to go with my classroom theme, but here's a sneak peak.


My kids always love little get to know you games at the beginning of the year...probably because it means they don't have to do to much real work lol.  These conversation sticks are sure to be a big hit. It includes stick labels and jar/can label.


My classroom theme this year is chalkboards.  Soooo, I thought I'd add some fun decorating products similar to the ones I'm using.


We've got circle chalkboard center labels with blank ones and chalkboard drawer labels with blank labels.  There are 4 binder covers with spine covers that read: Speech Binder, Student Data, Response to Intervention, and Lesson Plans.

4 cute chalkboard with colorful background speech posters finish out this pack.

Everything you need to get your speech room ready is all right here in one pack!  Check it out at my TPT store HERE.

Enter for a chance to win your very own copy via the rafflecopter below!  The winner will be chosen on Sunday!  Good luck!

a Rafflecopter giveaway

Thursday, July 17, 2014

Organization Week: Binders and Planners Linky!!

Organization Week Day 4: binders and planners.  Do you keep a data binder?  What about a therapy planner?  Maybe you do everything on the computer or iPad.  Welp, today we're talking all about how we plan and keep data!  Plus, we're having a link party so that everyone can share their ideas!


To link up all you have to do is create a post talking about your binders, planners, or even techy ways of keeping data.  Don't forget to use the graphic above in your post.  :)  Then link up using the inlinkz button below!  Easy peasy.

Since I've already talked to you about how I organize and use my planner (see this post!), today I'll be focusing a little more on my data binder.  This post may contain amazon affiliate links for your convenience.


First off, I've had a few questions about the binder itself, since posting this pic on instagram.  I ordered it from Amazon.  It's a Martha Stewart extra wide binder.  It's soft and a beautiful blue shagreen color.  I'm in love.


I have a silhouette cameo that's kind of like a cricket if you aren't familiar.  It cuts letters and designs onto paper or fabrics.  I cut my letters onto black vinyl to make the cover and stuck them on.  It turned out pretty cute, so I'm happy with it.  :)

When you open it up the rings are easy to open and positioned on the side.  I like that about it, and because it's extra-wide, it covers the tabs when you close it.


I also ordered these post-it notes and tabs when I ordered my binder.  It's great that it just attaches to the rings inside, and I find that these sticky notes attach better than others.

Ok, so here's the low-down on what I keep in my binder:

  • Front: Post-its, laminated data sheets, my schedule, school master schedule, excel student list
  • Pocket tabs Pre-K through 5
    • Each pocketed tab holds all of my tally sheets/therapy logs for my kids in that grade.  I keep their medicaid billing forms inside the pockets on one side.  On the other side I put extra tally sheets for each student.

  • Back: Extra forms, data sheets, or daily lists.  I also attached pockets for paperclips.


In case you were curious, my tally sheets (aka therapy logs) look a little something like this:


Anyway, I just thought I'd give you a little glimpse into my binder.  What about you?  How do you use your planners and binders? 

Share your ideas in the comments or link up below!!


Wednesday, July 16, 2014

Organization Week Day 3: Data Collection Freebies!

I hope you've been enjoying this week's organizing posts!  It's always fun to exchange ideas and be able to take a few things back to your speech rooms.  We've tackled classroom materials and paperwork the last couple days, so today I've got some freebies for you!  Woohoo!


Day 3: It's all about data tracking today.

A friend from work recently told me that she laminates her data sheets and reuses them.  I LOVED this idea, so I created a few fancy ones to do just the same.


There are 3 types in this packet: one for group sessions, one for a large sample, and one for if you're tallying different skills.

To make them just print and laminate with thick laminating pouches.  I printed and laminated several so I can keep them in different places.

I punched holes in a couple so I could keep them in my binder.


To take data I just use an ultra fine dry erase marker (I got mine at Target).  The numbers on the sides make it easy for me to quickly count it up and total it!


You can use the large sample sheet if you will be hitting a lot of trials or tallying a large fluency sample.  There are 400 squares included in that one.


The multi skill sheet is great if you're in a classroom and targeting several skills at once or if your student has several sounds that you are trying to track.


After you transfer the results to their tally sheets, everything just cleanly erases so you are ready to go for your next session!


I know there are several apps and new techy ways to collect data, but sometimes you just gotta keep it old school.  Grab these free data sheets at my TPT store HERE and create your own!

What do you think?  Don't forget to leave some lovely feedback if you download.  :)

Tuesday, July 15, 2014

Organization Week Day 2: Paperwork!

My most favorite part of my job is all of the paperwork that I have the privilege of completing -said no SLP ever!  Unfortunately, paperwork is just something we all have to get a handle on, which is why we are tackling this topic during Organization Week.

Day 2. Paperwork!


Here are a few tips that will hopefully help you rein in some of your paperwork drama.
This post may contain amazon affiliate links for your convenience.

#1 Use your filing cabinets.

If you have IEP authority on cases or handle a lot of confidential papers like I do, I'm sure that most of you have a filing cabinet.


I've known some that just use their top drawer or 2 for files but then fill their bottom drawers with random junk.  Everything just ends up getting piled in.

via
That's precious space, friend!  Grab some hanging file folders and put it to good use.


I use mine to store homework packets by sound.  I have a file for each of my most frequently worked on phonemes.

You could even revamp an old filing cabinet to make it a pretty little piece of furniture for your speech room.  Start HERE for some great ideas.

#2 Color code your forms and files.

Doing this will make it easier to spot the paper you need in a hurry.  Plus, it's just so pretty.

I'm in the process of color coding my forms.  Check out the "before" shot.  Haha.


Here is the system I'm planning to use (with the hanging files mentioned above):
Red - RtI and screening forms
Blue - Eval/Re-eval forms
Yellow - IEP meeting forms
Green - Teacher checklists
Purple - Other

I'm hoping it looks something like this when I'm done!  :)
Source

#3 Hanging pockets for frequently used forms.

If you want to make it even more convenient, store your most frequently used forms in a hanging pocket.  We are utilizing that wall space!

This one is fabulous!


Or make your own DIY pocket chart by following a tutorial like this one.

I have this cascading file box from the Container Store.  It's super cool when you need something portable!


It looks like this when you open it up!  I use the metal circle to hang it up on a hook.  Check it out HERE.

#4 Drawers and crates

I love to use plastic drawers to keep my paperwork system flowing.  I got these fancy ones from the Container Store, but they also have similar ones at Target or Walmart.


Check out this post from last year to see how I use each of these labeled drawers.

File crates are also great to keep your papers in, especially if you don't have the drawer space.  You can usually find them at Walmart for pretty cheap.


Or this deal from Amazon is a steal! $24 for a pack of 6:  Storage Crate, White, 6-Pack

Because my district has SO many forms, I keep them in a crate on top of my desk table.  That way it's easy access for both me and the other therapist.  My hanging pockets are just for the forms that I need frequently or on a daily basis.

#5 Be creative and make it pretty

Just like with classroom materials organization, sometimes you gotta get creative with paperwork too.  Ask yourself what forms do I use regularly and which only come around once a year?  What papers will I need to access quickly?  How can I use my space to keep my paperwork organized?  What kind of system could I make work for me?

When you answer these hard questions, sometimes you need to think outside the box to find a system that works for you.  Aaannnd if you work at making it pretty and cute, you'll find you're more likely to keep at it.  Here are a few fun ideas I've come across.

This fun magnetic strip would be perfect for notes and reminders or even kids' artwork.


I love these sturdy magnetic clips for my white board.  They can hold several papers or charts at one time.


Cover some clipboards with scrapbook paper and hang them on your wall.  These are great for keeping those forms together, plus they're super cute!

Source
Binders are also a great idea for keeping data.  Be sure to stay tuned later in the week to find out more about how I use those!


What system do you use to keep you paperwork organized?  I'm always revamping and would love to hear your ideas!!

Monday, July 14, 2014

Organization Week Day 1: Classroom!

Welcome to Organization Week!  I have a little confession to make.  I love office supplies.  And school supplies.  And pretty baskets and bins.  Hi, my name is Lauren, and I have a post-it note addiction.  lol.  I'm excited about this week because I can share with you my love for all things paper and baskets and labels.

Day 1.  Classroom Organization!


I use the term "classroom" loosely.  I know that some therapists do not have their own classrooms all to themselves.  I actually share mine with another therapist.  Some of you may even work out of a storage closet, basement, or a random place in the school sectioned off by partitions.  Heck, your office may only consist of a giant super duper bag and a rolling cart.

No matter where you find yourself next school year, I hope a few of these organizational tips might help you.
This post may contain amazon affiliate links.

#1 Utilize your wall and door space.

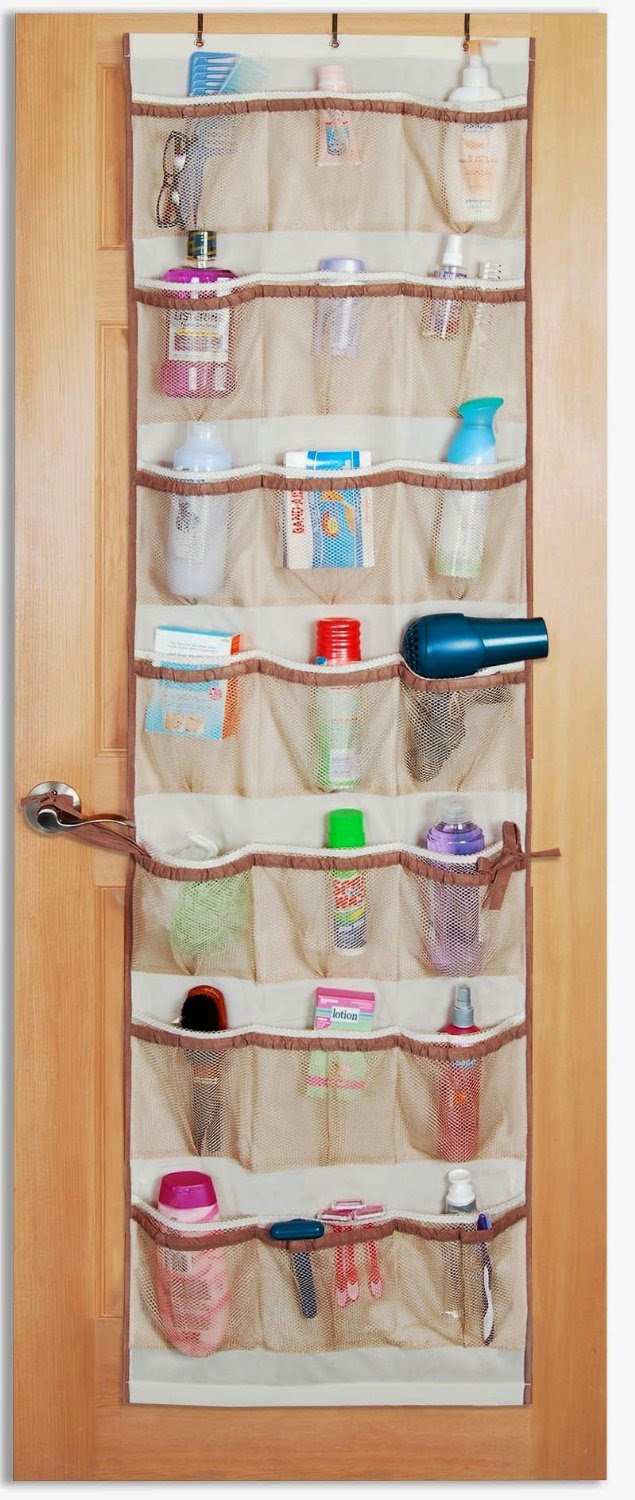
If your space is small, you need every inch you can get.  Make good use of your wall and door space with over the door organizers, hanging files, or cork boards.

How pretty is this one?


Or use one of these to store arts and craft supplies, card decks, tongue depressors, and more!


Love this for important reminders, plus you can use the dry erase part for therapy!


#2 Plastic drawers and cutesie bins are your friends.

"A place for everything and everything in it's place."  As annoying as that mantra has always sounded to me, it is unfortunately true if you ever want to find anything.  Drawers, pockets, and bins are a big help when you have lots of little supplies, like I do.

I got this tall plastic drawer storage from Walmart to hold my arts and crafts.


I put lots of the supplies I use frequently in this Thirty-one pocket bucket and keep it on my table. :)


I love this rolling cart (excuse the messy top drawer from being sloshed around on top of my cubbies).  I keep all of my working materials in this cart next to my kidney table. The supplies and themed materials for the week are kept in the drawer and files for me to just grab and go.  This way I don't have to hunt for them or get them out each day.


I got this one a few years ago, but here is one that is similar: Safco Onyx Mesh File Cart .  Or make your own teacher toolbox, like this one.  Just revamp it for an SLP.

#3 Label it...but make it pretty.

If you've heard it once, you've heard it a thousand times.  Labels are essential to staying organized.  Drawers and pockets may hold your supplies, but labels will help you keep putting it back there and keep stray objects from finding their way inside.

Find these free labels HERE!
Going the extra mile to make the labels pretty and uniform will give your speech room that "put together" look.

These cute chalkboard labels are included in my new Back to School Classroom Starter Kit.


You can even use labels to help "conceal" some of your clutter, kind of like Charity from The Organized Classroom Blog does HERE.

#4 Sort materials into ziplock bags and crates.

How do you store your TPT materials?  I know some that use binders or boxes (great ideas!).  I like to use ziplock bags and file crates.  I put all of the materials for a packet inside the ziplock then arrange them by theme or disorder.


I like this system because I can quickly glance and grab what I need without digging too much.  TPT materials aren't the only thing you could do this with.  You could also sort card decks, worksheets, or other therapy materials in crates and baggies.  :)

#5 Get creative.

Sometimes you have to use a little imagination and get creative with your organizing, especially if you're on a tight budget.  For example, you might place command hooks on the side of your shelf or the inside of your cabinet to hang scissors or supplies.  OR use the back of your teacher desk like a board.  Hang things you need on it or make it functional for you in some way.

Stand back and assess your space.  What can you make functional?  How can you make it work for you?

You can also get some great ideas from Pinterest.  You can follow my speech room organization board for some ideas.  This buzzfeed article has lots of cute ideas for teachers that you may be able to make work for you.
 
Image from BuzzFeed 

The important thing is to find what works for you and stick with it.  Make it pretty.  You have to be there for most of your day most of your week, so you want to be able to enjoy your space.  :)

Check out my blog post from last year for a few other essential items you might need for your room.


Be sure to check back tomorrow to find out how I handle paperwork!

How do you keep your speech room organized?  I'd love to hear your ideas!!


Related Posts Plugin for WordPress, Blogger...